Table of Contents
List of Figures
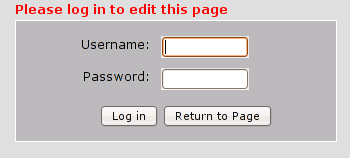
- 2.1. The log in box
- 2.2. The standard Dragonfly editing toolbar
- 2.3. Publishing Buttons
- 3.1. The Link dialog box
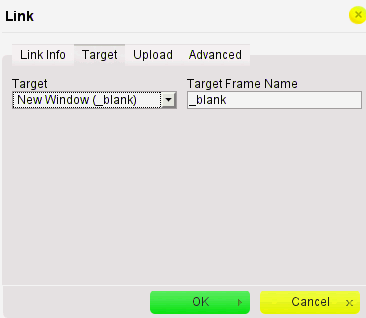
- 3.2. Selecting the "New Window" Target from the Link dialog box
- 3.3. The File Manager dialog box showing all files and folders
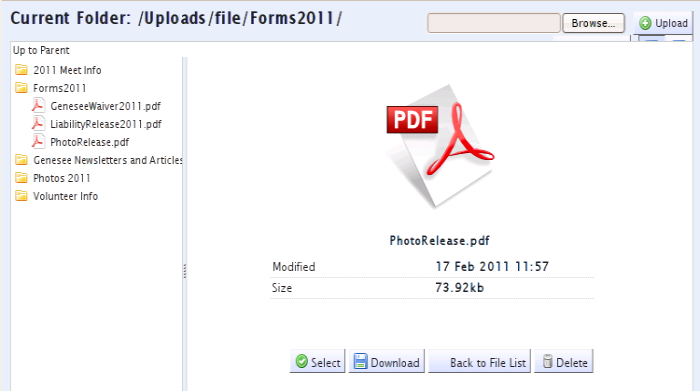
- 3.4. The File Manager showing a selected file
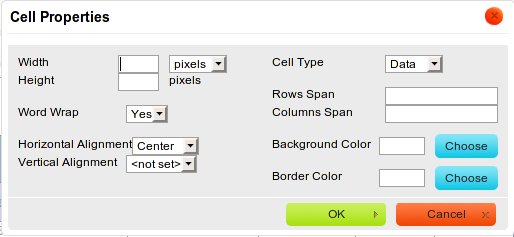
- 4.1. The Cell Properties dialog box
- 4.2. Table details
- 4.3. The Dragonfly style selector
- 5.1. The Image Properties dialog box with image file selected
Dragonfly is a content management tool designed to enable non-technical users to apply updates to website content in a simple, quick, and straightforward manner. Content changes are made right in the browser; there is no need to install any software, and no need to learn any special notation. The user merely clicks an icon to start the editor, and then works with the web page as if it was a standard word processing document (like MS Word). When the changes are complete, the user clicks "Publish" and the updates are applied to the website in real time.
All editing functions are password-protected. Website administrators can have access to the entire site, or be limited to particular pages, at the discretion of the chief site administrator. Website administrators can edit text, add links, and add or remove images pictures. They cannot add, reorder, or delete pages or change background images or logos.
There are three important icons in the lower right hand corner of each page.
![]() edit
edit
![]() print
print
![]() logout
logout
The first two appear at all times: the edit icon, which is password protected and for the use of your website administrators to edit content, and the print icon, which anyone can use to display a printer-friendly version of the page. The third, the logout icon, appears when you are in edit mode; this indicates that your id and password have been authenticated, and you will not be prompted again as you edit different pages. Once you have finished all your edits to the site, you should click on this icon and you will be logged out. This is not absolutely necessary, but it is more secure to close an authenticated editing session when you are done, rather than just leave it open.
Table of Contents
Each page and content box has a small edit icon in the lower right
corner. ![]() To open the
Dragonfly editor, click this icon. You
will be prompted for a user id and password. Enter your user id,
password, and click "log in".
To open the
Dragonfly editor, click this icon. You
will be prompted for a user id and password. Enter your user id,
password, and click "log in".
Once you have logged in, you will not need to log in again during the same session (if you close your browser, this ends your session, and you will need to log in again to edit a page).
After clicking "log in", you will be presented with a content editor which looks similar to a typical word processing application. The text and pictures from the current page will be displayed.
Once you have started Dragonfly, you can add, change, or delete text, change fonts and colors, etc, as you would when modifying any document. To edit existing text, or create new text, simply move the cursor to the point at which you want to begin and start typing. To format the text ("bold" or "italic", or to change the font color), use the toolbar above the textbox. You can delete existing text as you would with any text editor.

Hyper Text Markup Language (HTML) is the language that directs browsers how to display web pages. The page editor allows you to directly update the underlying HTML for your page. To view the raw HTML, click the Source button. If you know HTML well, this option may provide more granular editing capability than you get via the basic page editor. If are a little familiar with HTML concepts, this may allow you to fix an editing issue (e.g., if the editor won't allow you to change a color, there may be a "color:" tag in the HTML source that needs to be deleted). Think of this as the old "reveal codes" option that came with WordPerfect, which allowed you to see every formatting tag being used in your WordPerfect documents.
If you don't know HTML at all, and don't want to, it's best to stay away from this option. You could inadvertently delete a tag which will change the formatting of a page or section. If you make a mistake like this, simply go to the buttons at the bottom of the page and click on Cancel Changes.
As soon as you open Dragonfly, you will notice four buttons at the bottom of the page : Publish; Preview; Cancel Changes; and Cancel Changes and Exit Editor.

Once you have entered your changes, you may choose to preview them, or publish them right away. Publishing the changes updates your live web site immediately.
To Preview your edits, click the Preview button. You may also test links using the preview window. When you are done previewing, just close the window by clicking the X at the upper right. Note: this option shows your changes in a pop-up window; therefore, in order for this to work, you must enable pop-ups (for this site) in your browser.
To Publish your edits, click the Publish button. Your changes will be saved immediately and be available on the live website. Note: your changes will not be saved until you publish.
To Cancel your edits, you have two options. If you have made changes to a page, but have not yet published the page, you may cancel all your changes and return the page to its prior state by clicking Cancel Changes. After this, you can essentially start over with your edits. If you want to exit the editor without publishing any changes, click Cancel Changes and Exit Editor.
Table of Contents
You may post a link to another web page or document. If the document is not already available on the internet, you will have to upload it to your web server. You have the option of doing this when you create the link. In most instances, you will want the new document or website to open in a new tab, so that the user does not navigate away from your site.
To add a link to a web
page, open Dragonfly as
explained above. Once you are in the page editing mode, type the text
you want to serve as the link, and select it. Then, click on the "link"
icon in the tool bar. ![]() Note: if you are changing an existing link, it's
best to click the "remove link” icon first.
Note: if you are changing an existing link, it's
best to click the "remove link” icon first.
Clicking the link icon will bring up the Link dialog box.
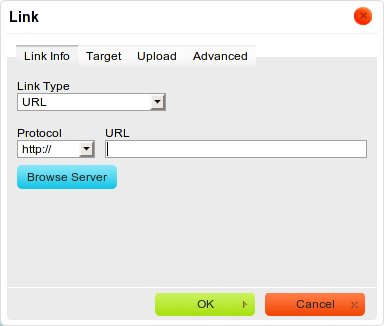
To link to another web page or a document that is already on the internet, just type in (or paste in) the URL for that page (e.g., http://www.csi.org/) in the box labeled "URL".
To have the link open in a new browser window: In most cases, when adding a link, you will want to open a new browser window to show the website or document rather than force the user to navigate away from your site. To make your link behave this way, click the "Target" tab in the Link dialog box, and select "New Window" as the target.
To create the link, click OK and you will be returned to the editor and your link will be created. You must then follow the process to publish the page for the new text, including the link, to be saved to your site.
To link to a document that you have uploaded to your web server, or to upload a document in order to link to it, click the "Browse Server" button in the Link dialog. This will bring up the File Manager dialog, showing a list of directories and files that are already on your website server. The contents of each directory can be seen by single-clicking on the directory name.
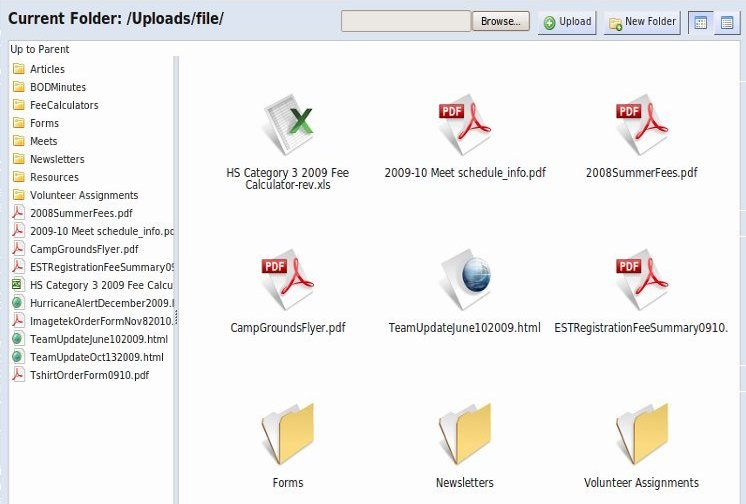
To link to a file that is already uploaded, just locate it in the appropriate directory and click it. You will then see a dialog box with the choices: Select; Download; Back to Filelist; and Delete (Note: not all users will have Delete privileges). Click on "Select". This will return you to the Link dialog, and the URL box will be populated with the path to your file. At this point, you can just set the target (to "New Window" ) and click OK to create the link. Continue to edit the text, or click on Publish to publish your changes to the live website.
To upload a new file from your computer, first determine which directory it should reside in on the web server. Single-click the directory where you want to put the file. Click the browse button at the top of the page. This will open a file upload dialog box. Select the file you wish to upload, and click the button that says "Open" at the bottom of the dialog box. You will be returned to the File Manager dialog box, where you should click "OK". You will get a popup message that says "New file uploaded successfully" and give the path to its location. Click "OK" again, and you will be returned to the folder where it has been saved. Click on the file, click select, and then this will return you to the Link dialog box. The path to the newly uploaded file will be in the URL box; set your target to "New Window" and click "OK" and you will have created the link to the new document. Publish to save your changes.
See Chapter 6 for guidelines organizing and naming files. Please ensure that your files are named according to the standard naming convention for your site; this will make maintaining the site and keeping track of documents much easier. In general, it's best to upload documents in formats that everyone can read (such as .pdf), rather than formats that require special software (such as MS Word or Excel).
Tables can be a little tricky to manage, but there are a few commands that should allow you to do most operations. You can add or delete text within a table (i.e., the calendar pages) as you would with any word processing package.
To edit text in table cell, simply move your cursor into the cell you want to edit, and type in the text. Publish as you would for a regular page.
To change the background color of a row, select the entire row (click the first cell, and drag your cursor across the row; all cells will be highlighted). Right-click anywhere in the selected row, and select “Cell” and then “Cell Properties” from the drop-down menu. In the resulting Cell Properties pop-up box, click the Select button next to the Background Color input box; select a color, and click OK; click OK in the Cell Properties dialog, and your color change will appear in the editor.
To add or delete a row, right-click on a row; select “Rows” and then “Delete rows” to delete the row you have clicked on. Select “Rows” and then “Insert row” to insert a new row under the one you have clicked on.
To change the font (size, weight, or style) for a row, select the entire row. Use the font controls as if you were changing any selected text; your changes will be applied to all text in the selected row.
Exterior table borders. All Dragonfly sites have a default table style that coordinates with the look and feel of the site. For instance, your default style might include dark blue cell borders with a light blue background. You can change this style by using the controls listed above. However, in some cases you may want to make the exterior table borders invisible (like if you're just using tables to position pictures on a page). For this, you need to use a special built-in table style.
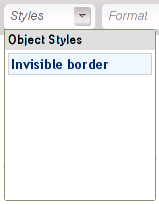
To use this style, open the Dragonfly editor, and click anywhere within the table. Now, in the bottom left of the editor, you should see some text that looks like this:

Click on the word "table", and your entire table will be highlighted. Now click on the Styles button in the Dragonfly editing toolbar. You should see a style listed called "Invisible Borders". Click on this and it will apply that style to your selected table, and render your exterior borders invisible.
A note about image size. Although Dragonfly lets you re-size an image once you have added it to a page, it is a good idea to scale it down to an appropriate size prior to uploading it or inserting it into your page. You should avoid uploading images that are too large (more than a few hundred K, or kilobytes), as this will make the page slow to render. If you are replacing an image currently on the site, you can go into "Source" and see what size the current image is (look for an "<img>" tag that has height and width parameters). Use your photo editing software to re-size the image, and then save the scaled-down image with a new name prior to uploading it. Choose the revised image when adding it to the page.
To add an image to a page, open
Dragonfly. Place the cursor in the first column where
you want to insert the picture (during the load process, you will specify
whether you want the picture aligned to the left or right). Click the
"Insert Image" icon.  This will bring up the Image Properties dialog
box.
This will bring up the Image Properties dialog
box.
Click the "Browse Server" button. This will bring up the file manager, and you will see a list and icons of image files, similar to what you see in Figure 3.3 (Note: all image files are kept in the same directory on the web server). If you want to insert one of these, just single-click the file name or the icon. The image will be displayed larger, with the options to "Select"; "Download"; "Back to File List"; or "Delete." Choose "Select" and you will be returned to the Image Properties dialog box. On the left side of the dialog box, you can see the size of the image, and also can choose the alignment. Click OK and the image will be inserted into the page. Click on Publish to save your changes to the live website.

To set the alignment, select Left or Right from the drop-down menu labeled Align. Click OK to insert the picture and be returned to the content editor.
To adjust the size or move the image, once it has been inserted into the page editor, you can click on any corner and drag the borders to the size you want, or move it by clicking it and dragging it to a new location.
To upload a new image, place the cursor in the column where you want to insert the image. Click the "insert image" icon, which will bring up the Image Properties dialog box. Click the Browse server button, which will bring up the File Manager box. Across the top, you will see an option for "Browse" again. Click on this and it will bring you to "File Upload", which will enable you to browse for images on your computer. Select an image and click "Open"; this will return you to the File Manager dialog box. Click "Upload" and it will bring up a box telling you that the file has been uploaded successfully. Click "OK", then find the newly uploaded image in the list. Click on it and hit "Select", and you will be returned to the Image Properties box. On the left side of the dialog box, you can see the size of the image, and also can choose the alignment. Click OK and the image will be inserted into the page. Click on Publish to save your changes to the live website.
What kinds of files can I upload? You can upload text files, spreadsheets, or pretty much anything, but it is strongly advised that you save it in a format that enables any user to open and view the document. People use many different kinds of software packages, and it is important that any file you make available on your website looks the same regardless of whether the user is using a Windows PC with some flavor of MS Office, or a Mac, or Linux. To accomplish this, any document you post on the website should be saved to the server as a .pdf file, a format that can be read by software that resides on virtually any computer. A .pdf is like a laminated piece of paper – it can't be changed without special software, and no matter who opens it, it will look the same. It is very simple to convert a file to a .pdf; in fact, most word processing software gives you an option from the file or print menu to “save (or export) as .pdf”
How should uploaded files be named and organized? Over time, a website can potentially grow to include links to numerous files. It's easy to lose track of these files if they're not organized properly and named according to conventions that make it easy to tell what the files are for. If you add a lot of files each year (or season, for teams) it is helpful to create folders for each year (or season) to save them in. Also, you should create standard methods of naming documents in frequently used categories.
In general, avoid the use of spaces in file names, as web browsers sometimes have difficulty interpreting these. Join words together and capitalize the first letter of each word for readability. Alternatively, use underscores (_) to separate words.
How do I create a new folder in the Uploads file manager? Highlight the item you wish to create a link for, and click the Link icon. This will bring up the Link dialog box. Click on "Browse Server" to launch the File Manager (see Figure 3.3). In the top right corner, there will be an option for "New Folder". Click on that, and it will bring up a dialog box asking you to enter the name of the new folder. Type in the name and click "Create Folder".